How do I make a one-time batch payment?
Upload a single spreadsheet and make a one-time payment to multiple recipients, in one or more currencies, effortlessly. The beneficiaries are not saved in your account, so your Recipients List will remain clear of any beneficiaries you only intend to make a single payment to.
Watch 2-minute video -

Follow these steps -
Step 1

Select Send Payments from the navigation bar and then CREATE BATCH.
Step 2
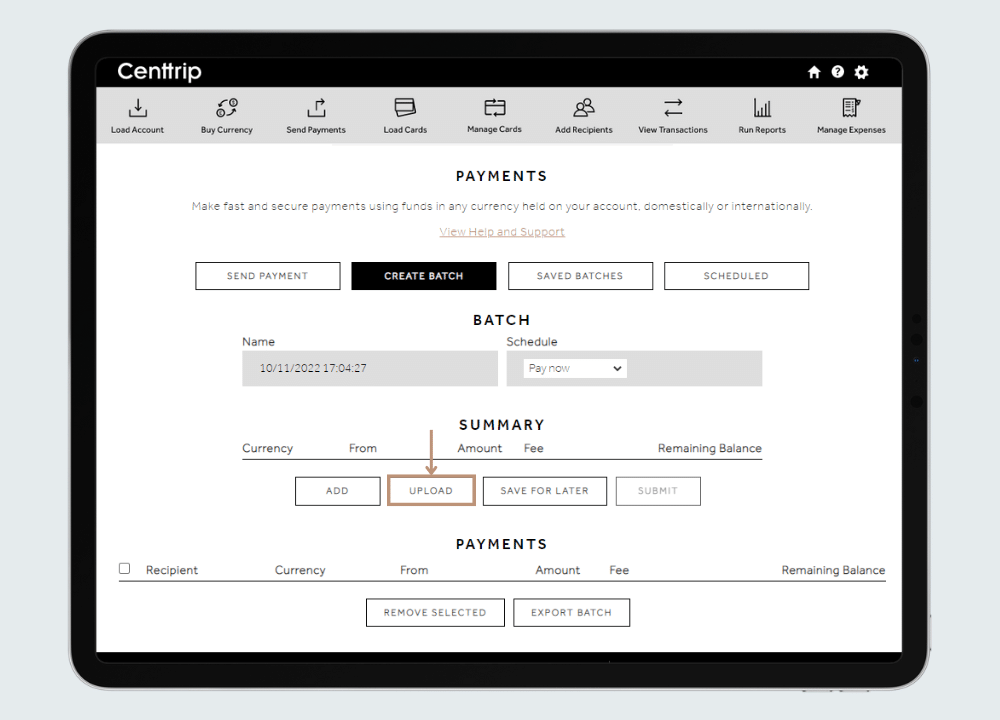
Click the UPLOAD button.
Step 3
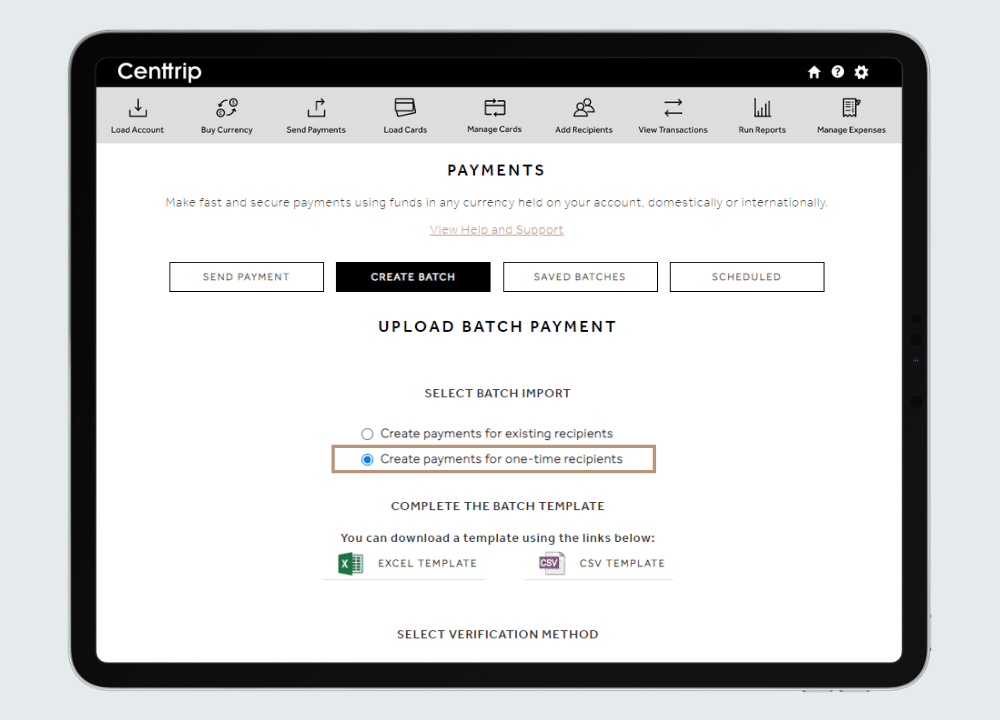
Tick the box labeled 'Create payments for one-time recipients'.
Step 5
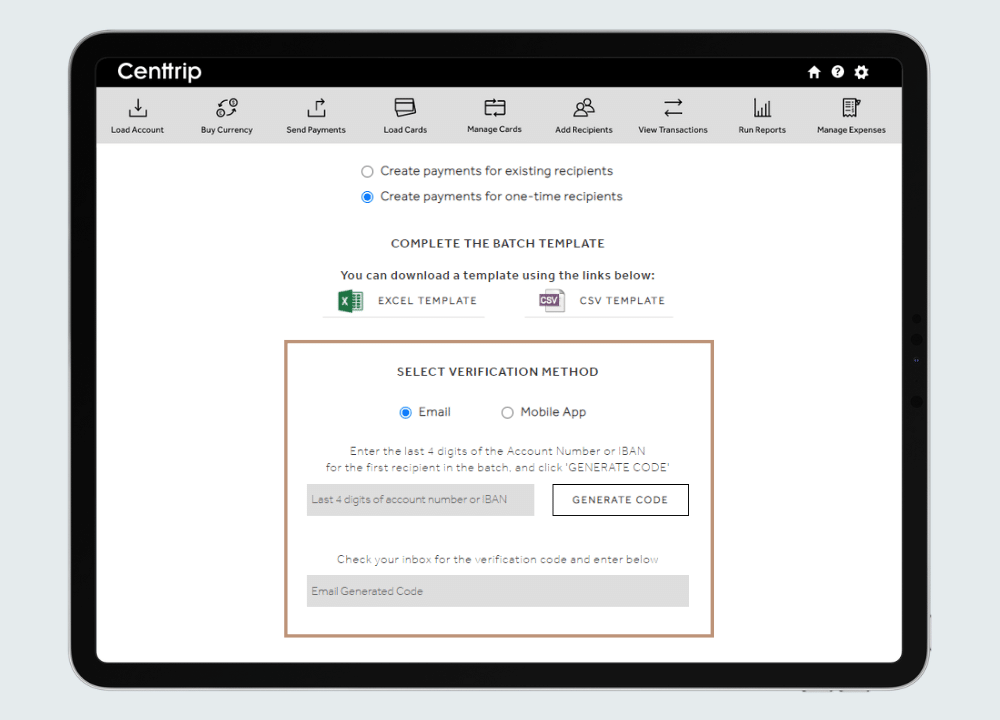
Follow the on-screen instructions to verify using either an app or email generated code.
Step 6
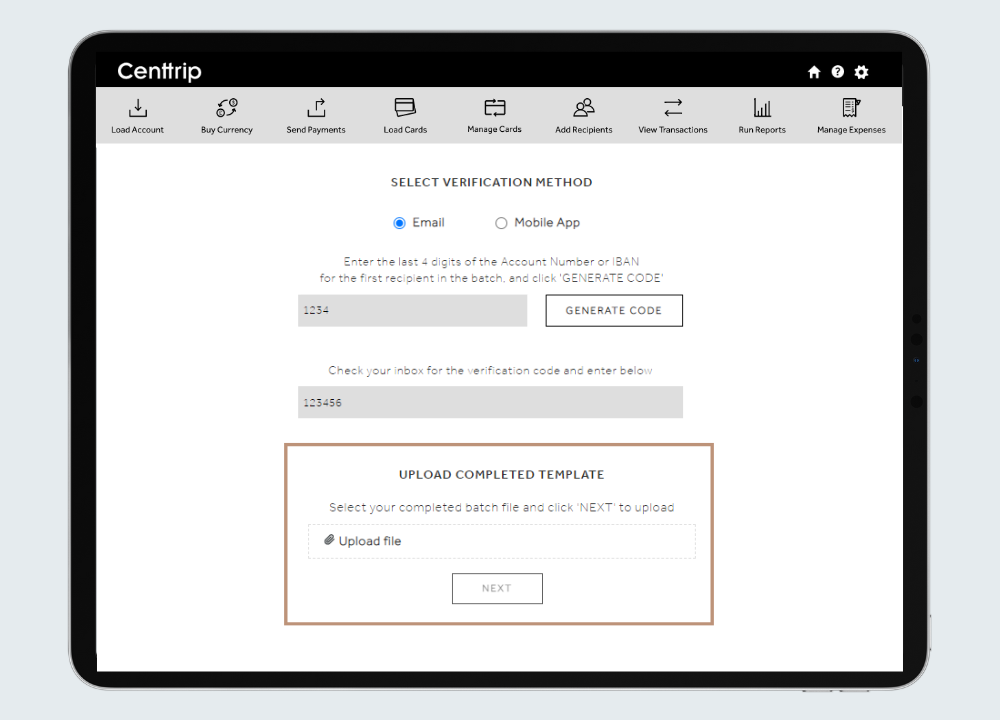
Upload your saved batch payment file and click NEXT.
Step 7

Review your batch summary on-screen. If needed, you can remove payments from the batch by selecting them and clicking REMOVE SELECTED.
Step 8

By default, the batch name will be the date & time created - you can rename your batch for easier reconciliation.
Step 9

Use the dropdown to select whether you would like to send your payments now, or schedule them for a later date.
Step 10
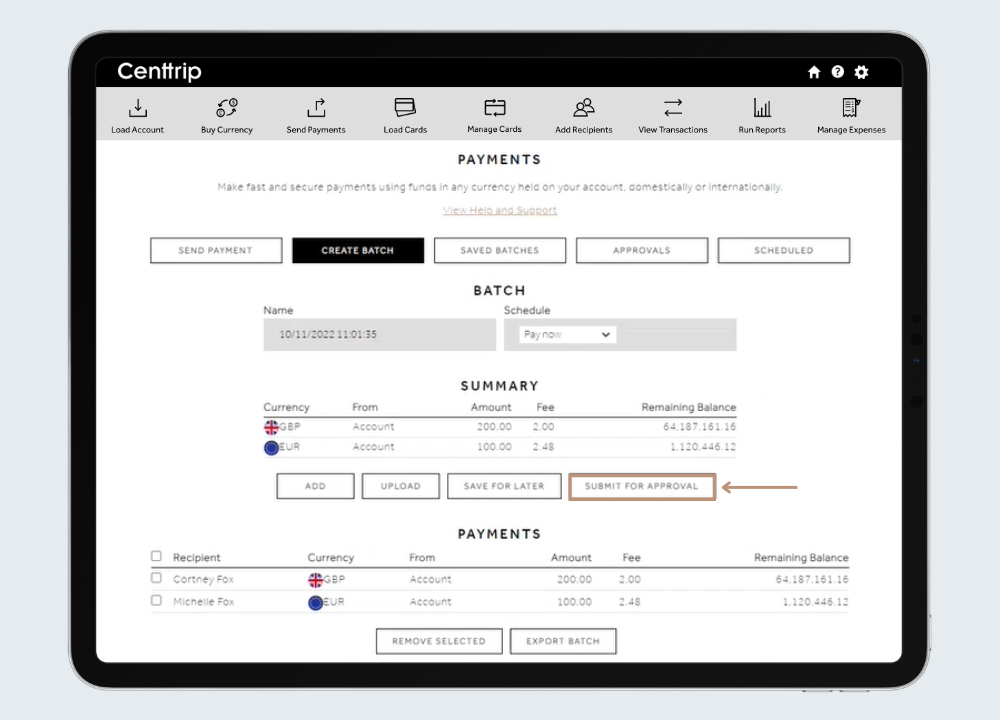
Once complete, you can save your batch to edit later, or submit it now. If your payments require approval, your administrator(s) will be notified - you will receive an email confirmation once processed.
